• About us
  • Cook’s notes
  • Shared Kitchen

Shared Kitchen

Real food from scratch

Summer Caprese Salad

Summer days drawing to an end

Ilaria here. I know, it’s been awhile …

This is pretty much a Caprese salad sitting on top of a bunch of our homegrown lettuce. The point of it is, it’s simple, and celebrates these last days of summer…

Our once ardent green tomato “jungle” now resembles a multi coloured Pollock cop-out full of yellows, browns and hay. Yes, our plants are spent and the fruit is on the decline. But we welcome the autumnal tomato pickings – they do not disappoint.

I collected a mini handful of tomatoes, picked a variety of lettuce leaves from our over-stuffed planter (as it turns out, 18 lettuce seedlings in a 30cm x 30cm planter is actually quite excessive), and gathered a generous bunch of homegrown basil, putting it all together in a colourful mess in a bowl with mozzarella, sprinkling in flaky sea salt, and drizzling everything with extra virgin olive oil.

On searingly hot late-summer days nothing beats the aromatic taste of nostalgia: sun-warmed tomatoes plucked from the vine, a waft of basil, a spot of breeze … simplicity at its best.

Summer Caprese Salad 1

Prettier than a bunch of flowers.

Summer Caprese Salad

The last of the tomatoes

Caprese salad 2

Oops. Too stuffed in!

Share Share on StumbleUponTweet about this on Twittershare on TumblrPin on PinterestShare on FacebookGoogle+
Beer Festival

No need to get the beers in … go out for them!

Yep, if you are in Christchurch 27th January, come and join us at The Great Kiwi Beer Festival, Hagley Park, and take your choice of beers from more than 40 brewers.

Ilaria and I will be whipping up a little hot something in the food marquee, featuring summer’s produce of sweet corn, chillies, watermelon, avocados and tomatoes, and  adding layers of flavour with preserved lemons, kaffir lime leaves, mint and freshly ground spices, and even more chillies. We’ll have a delicious bounty to team up with some top brews, so call by and watch the action.

Hoppin’Hot with Julie and Ilaria Biuso

12.00 noon

AND

3.00 pm

The Great Kiwi Beer Festival

Hagley Park

Christchurch

27th January

Beer Festival 1

Ilaria deciding on a beer match

Beer Festival 3

There doesn’t seem to be enough feta …

Beer Festival 4

That looks better!

Beer Festival 5

Delicious!

Beer Festival logowww.greatkiwibeerfestival.co.nz

Share Share on StumbleUponTweet about this on Twittershare on TumblrPin on PinterestShare on FacebookGoogle+

Cucumber Salad – Ilaria nabs a bargain

Ilaria spied a bargain – cheap cucumbers – and was in. This recipe is not rocket science, hardly even a recipe of ‘this or that’, but it is sublime none the less.

Take a good telegraph (tender-skinned) cucumber, and by good, I mean, one that is not showing any signs of softening, peel and slice thinly, put it on a plate and sprinkle with a little flaky sea salt if it takes your fancy. Next, add some dollops of unsweetened yoghurt (check the ingredients on the back of the pack and buy the brand with the least additives included).

Cucumber salad 1

Then get yourself a handful of fresh kaffir lime leaves. My kaffir lime tree is in a broken pot shoved in a corner of the drive and gets very little love and not much sun, but it is in exceptional health. As long as I hose off any infestation of ants or sticky insects which have a go at it from time to time, it seems to truck along really well and produces several bursts of new growth a year. It’s one of those weird things – if I re-pot it, I’ll probably upset it … so it might stay in the broken pot for another year.

Anyway, lay the leaves flat and cut out the spines, then roughly chop the leaves. Transfer to a spice or coffee grinder and grind to a sort of furry-looking dust. It has to be really fine. Then sprinkle the lime leaf dust over the cucumber and serve. The lime scent is magnificent! Serve with fish, barbecued, baked or pan-fried.

Cucumber Salad 2
Cuucmber salad 6
Cucumber salad 5

If you don’t have lime leaves, you could use lemon leaves, choosing tender leaves and preparing them in the same way. Cucumber and yoghurt is also great with dill, coriander (cilantro) and mint.

Cucumber salad 3

Share Share on StumbleUponTweet about this on Twittershare on TumblrPin on PinterestShare on FacebookGoogle+
Eggs 'n Avo

Eggs ‘n Avos – dish it up for brunch this weekend

12 September 2017 BY Ilaria Biuso
SERVES: 2

Squeeze over plenty of lemon juice and add as much biting hot sauce as you dare. And WOOF!

Ingredients

2 medium (size 6) free-range eggs, at room temperature
4 slices sour dough bread
Butter, optional
2 small or 1 large avocado
Lemon for squeezing
Flaky sea salt and freshly ground black pepper
Sriracha sauce, or chilli sauce or spicy chutney of your choice
Extras: pan-fried or slow roasted tomatoes, rocket or basil leaves

Method

1 Have eggs at room temperature (see Recipe Notes below). Carefully lower eggs into a saucepan of gently boiling water and cook for 7 minutes to produce eggs with just-set whites and flowing yolks, or adjust time according to your preference (allow a minute or two longer for large eggs). Drain off water and cool eggs under running cold water. Shell. Learn more about eggs here: Eggs

2 Meanwhile, get onto the toast and avocado. Toast bread, or fry it in a little sizzling butter. Put bread on plates.

3 Halve the avocados, remove stones and scoop the flesh onto a board. Squeeze a little lemon juice over avocado and season with salt and pepper. Squish onto bread. Cut eggs in half or into quarters and place on bread. Season with salt and pepper and dot with sriracha (chilli) sauce. If liked, add a few tomatoes or a handful of rocket or basil leaves. Serve immediately.

Recipe Notes

If you take eggs straight from the fridge, put them in a bowl and cover with hot water (not boiling water, just tap hot) and leave them for a few minutes to take the chill off (if you don’t do this they will most likely crack when you put them in the boiling water, and the timing will not be accurate).

Eggs

Eggs

Share Share on StumbleUponTweet about this on Twittershare on TumblrPin on PinterestShare on FacebookGoogle+
Cashew Kumara Saag

Cashew Kumara Saag

1 August 2017 BY Ilaria Biuso

Ingredients

3 biggish (roughly 1 kg/2lb 2oz) red or gold kumara (sweet potato)
3½ Tbsp extra virgin olive oil
Salt and pepper to taste
1 large brown onion, peeled and finely chopped
3 cloves garlic, peeled and crushed
A thumb-sized piece fresh ginger, peeled and grated
1 Tbsp garam masala
1 tsp cinnamon
1kg (2lb 2oz) frozen spinach, thawed
100g ( 3½ oz) raw cashew nuts
Plain, unsweetened yoghurt for swirling through at the end
Toasted desiccated coconut for garnish
Sliced red chilli, optional

Method

If you rent in Auckland like I do, I’m sure you’d agree that rental costs here are expensive. While we’re all hoping things will improve, it’s mostly beyond our control. What we feed ourselves, though, is within our control. That’s where the inspiration for my Cashew Kumara Saagwala stemmed from.

Over the last week we’ve endured some of the coldest days this winter, and the desire, and necessity, for warm nourishing food has become all the more urgent. I was hungry for something purse-friendly, but satisfying and substantial. I didn’t like the look of the price of chicken breasts, and even tofu seemed expensive. Kumara, or sweet potato, on the other hand had just come down in price and was reasonable. You’d be mad to use a mountain of pricey fresh spinach in a dish like this as it wilts down to near nothing; a kilo of frozen spinach however cost me $4.00!

While most of us are raking up huge electricity bills heating our homes, my Cashew Kumara Saag might help the budget in other ways. Teamed with a big bowl of steaming rice or spicy lentils it will feed a family of 4 or more, and is at the very least a deliciously cheap whack of goodness. What I hope it shows is that we can make smart decisions about what we eat over winter, keeping ourselves full and satisfied, while saving ourselves some coin. While we need protein, substituting it for a hearty vegetable dish with lentils every now and then never did any harm, especially to the bank account.

1 Heat oven to 180°C fanbake (or 200°C regular/400°F). Peel kumara (sweet potatoes), place in a shallow roasting tin lined with baking (parchment) paper and toss with 1½ tablespoons of oil. Sprinkle with salt and grind over black pepper, then bang in the oven until tender and semi crispy. This will take around half an hour or so, and you might like to turn the kumara with tongs after about 20 minutes just to make sure they are behaving.

2 While the kumara is roasting, heat 2 tablespoons of oil in a large pot and add onion. Cook on a medium heat for about ten minutes, until it is tender, stirring often. If the onion begins catching, add some warm water to help it soften and stop it from charring. Once the onion is softened and lightly browned, add the ginger, garlic, garam masala and cinnamon (warming up the spices like this opens up their full aroma and flavour). Add 1¼ teaspoons of salt, and stir for a minute until fragrant. Don’t freak out at the amount of salt – you need it!

3 Next, add the thawed spinach and stab it with a wooden spoon, breaking it apart until it’s a big wilted mess. Give it a good stir then add the cashews. Bring it to a gentle bubble, then simmer this all down on a super low heat for about 15 minutes; stir when you remember.

4 Once the spinach is cooked, add the roasted kumara chunks. Stir and simmer a little more until all is well in the land of Mordor! And by this I mean, until the excess water from the spinach has reduced and the mixture is thick and somewhat creamy. Check seasoning and adjust if necessary.

5 Whip out a tiny mini pan and over a very low heat, toast the desiccated coconut. Agitate it with a spoon constantly as the fat in the coconut causes it to burn very quickly. You want to take it off the heat when it is lightly golden in colour as residual heat will keep it cooking for a tad.

6 Upon serving, add a generous dollop or three of yoghurt and loosely mix through the curry. Dish up, and sprinkle the toasted coconut over the top. And add a few slices of hot red chilli if you want to spice it up.

tomato & shallot salad

Tomato & shallot salad

You can make a quick salad to go with the spinach by cutting tomatoes into wedges and mixing in a bowl with thinly sliced peeled shallot. Squeeze over lemon or lime juice, add flaky sea salt to taste, a drizzle of oil, and mint or coriander (cilantro). Serve immediately.

Share Share on StumbleUponTweet about this on Twittershare on TumblrPin on PinterestShare on FacebookGoogle+
Mulled wine

Glögg – Ilaria gets mulling

18 July 2017 BY Julie Biuso

Glögg is a mulled wine drink hailing from Sweden or thereabouts, usually studded with nuts and dried fruit, and always with a powerful alcoholic kick. Ilaria takes a sip ... or two!

Ingredients

4 caradmom pods, crushed, seeds extracted
¼ tsp coriander seeds
Small piece cinnamon bark
2-3 strips orange peel
Few slices peeled ginger
1 bottle full bodied red wine
70g (2-3 ounces) caster or brown sugar
3 Tbsp slivered almonds
3 Tbsp raisins
50ml (use 1½-2 fl oz) brandy
100ml (use 3 fl oz) vodka

Method

Glögg is very moreish, but if you glug it down it’s likely to put you over the limit for driving, so reserve it for occasions when friends are staying over or going home by taxi. You can use wine alone, leaving out the hard alcohol (yep, be a party pooper!). Serve it in mugs with spoons to dig out all the sodden fruit and nuts. They’re delicious! If liked, garnish with a fresh curl of orange peel, letting it fall into the hot wine to release the essential oils. Make it with white or brown sugar, and finish with port, vodka, brandy or sherry to taste. Leftover glögg can be reheated the following day.

1 Bundle the spices, orange peel and ginger in a piece of muslin and tie with string.

2 In a saucepan dissolve sugar in red wine, stirring. Add slivered almonds and raisins and the bag of spices. Turn off heat, cover pan and infuse for 2 hours. Gently reheat wine until piping hot, turn off heat, cover and infuse again for several hours.

3 When ready to serve, reheat, remove bag of spices and add brandy and vodka. Serve piping hot in mugs with long spoons.

Also see Mulled Wine & Vin Brûlée    Mulled Wine notesMulled wine 5

Share Share on StumbleUponTweet about this on Twittershare on TumblrPin on PinterestShare on FacebookGoogle+
Broccoli in the pan

Broccoli in the Pan

4 July 2017 BY Ilaria Biuso
SERVES: 4

Do you ever get spooked by broccoli? Not scared of it per se, but there are times when something about it gives you the heebie-jeebies? Fried Broccoli. Try it.

Hmm. Protein rich, gym-buff, meal plan images of salmon, steamed broccoli – sans dressing – and more salmon, dominate social media news feeds, and to be totally honest, that’s what spooks me. Food that’s all sort of nude and unloved. And the sight of steamed broccoli all forlorn in a dishwasher-abused cloudy plastic food container with MONDAY LUNCH scribbled on its top definitely gives me the heebie-jeebies. Don’t want to open that lid. Boring. Bland. Food sans pleasure, sans taste. INSERT OIL! INSERT SALT! Fried broccoli. Try it.

Ingredients

2½ Tbsp extra virgin olive oil
1 medium red onion, peeled and sliced
1 large compact head of broccoli (or use 2 small heads)
Salt and freshly ground black pepper
Freshly grated nutmeg
½ lemon for squeezing

Method

1 Put oil and onion in a medium frying pan and set pan over a medium heat. Once cooking is underway, lower the heat and cook gently for 10-12 minutes until the onion is tender and golden and smells sweet.

2 Trim broccoli then chop finely, or shave it with a sharp knife. Add to pan, stir well and cook, stirring often, for 7-10 minutes, until shiny, nice and bright in colour, and just starting to soften. Season with plenty of salt and pepper and a good grating of nutmeg.

3 Dish into a warmed bowl and squeeze over a little lemon juice. Serve immediately.

Broccoli in the pan 3

Chop chop

Recipe Notes

The broccoli is cooked in a pan, but not in water, so retains all its nutrients. It needs to be finely chopped, or shaved. I like it simply with salt, pepper and nutmeg, but you could add crushed garlic, squeezed juice from grated ginger or a little chopped rosemary (add these just before adding the broccoli).


Share Share on StumbleUponTweet about this on Twittershare on TumblrPin on PinterestShare on FacebookGoogle+
Prawn flatbread 1

Eating in the ‘Ham

27 June 2017 BY Julie Biuso
SERVES: Makes 2 but you may well want to make 4 (like, 2 each!)

This is flatters flatbread as eaten in the 'Ham!

Ingredients

1 medium vine tomato
½ cup tiny broccoli florets
12 or more frozen raw prawns, thawed
Olive oil if required
75g (2-3 ounces) creamy-style feta, drained and crumbled
1-2 small balls mozzarella (optional)
2 soft wheat tortillas (or use thin pizza bases)
2 Tbsp tomato concentrate
Few slivers of red onion
Salt and freshly ground black pepper to taste
Smoked paprika for dusting (or, if like us in the flat, just plain old paprika!)

Method

It was a fairly gloomy Sunday and it seemed just as cold outside as in. While our homemade burgers for lunch had left us feeling replete and happy, nothing about the flat seemed to take the chill out of the air. Then a LIGHTBULB MOMENT happened. See ya later useless energy-draining heater, and good riddance to you too, mismatched holey socks. It was time to disrobe and get moving, this time in the kitchen with the oven going full bore – who knew these contraptions were so versatile! Not only do they turn cold food hot and make cheese melt, they also waft a serious amount of delicious warmth all throughout the house. Done. Prawn Pizzas with a side of warming sumptuousness it was.

Prawn flatbread 3

Prawn flatbreads ready to cook

We eat a lot of chicken at our flat in The Ham (Sandringham, Auckland), so while it was tempting to stick with what we know we opted for a more interesting protein – prawns. In all honesty though, it’s down to your personal preference but if like us chicken is your go-to, why not mix it up a little? On a similar vein, we used left-over soft tortillas from a taco night and they worked perfectly as bases; replacing otherwise stodgy bases with these crispy ones means you have room for more filling! They also miraculously hold their shape and don’t collapse despite how much topping you throw on. Tehe. While we watched the feta brown and the mozzarella ooze (nothing wrong with double cheese…) we pulled up chairs in front of the oven and sat patiently, hungry again and finally warm. Happy cooking :)-

Prawn flatbread 5

Prawn flatbread baked and ready to eat

Prawn flatbread 7

Slice them up

Prawn flatbread 6

Tasting good …

Prawn flatbread 8

Wish I’d made more!

1 Slice tomato and pat dry with paper towels. Chop the broccoli to crumbs – it’s raw, which gives a nice crunch, but you don’t want lots of big hard bits. If you prefer, you can give the prawns a quick pan-fry in a hot pan in a splash of oil, just a few minutes a side. We found feta and mozzarella too much really, but if you do want to use mozzarella, and it works okay when you have sturdier bases, drain it, pat dry and slice.

2 Put tortilla bases on a baking tray and line with baking paper if you want to save on washing up (oh yeah!). Spread tomato concentrate on tortillas. Put the topping ingredients on in this order: onion slivers, tomato slices, broccoli crumbs, feta crumbles and prawns, then season with salt and pepper and a sprinkle or two of paprika.

3 Have the oven preheated to 180°C and cook for about 7-10 minutes, until bases are browned, prawns are cooked and everything smells good. Serve and eat hot.

Share Share on StumbleUponTweet about this on Twittershare on TumblrPin on PinterestShare on FacebookGoogle+
Roasted capsicum & butternut pumpkin soup 1

Roasted Capsicum & Butternut Pumpkin Soup with Chorizo Crumb

16 May 2017 BY Julie Biuso
SERVES: 4

A souper recipe from Ilaria!

Ingredients

Soup
2 Tbsp olive oil
2 small onions, peeled and diced
2 cloves garlic, peeled and crushed
Salt & pepper to taste
2 red peppers (capsicums), halved, cored, seeds out and chopped
1 medium butternut squash (about 1 kg/2¼ pounds), peeled, seeds out and chopped into little chunks
1 litre (US about 2 pints/UK about 1¾ pints) water or light stock

Chorizo crumb
1 Tbsp olive oil
75g (2-3 ounces) spicy soft chorizo sausage, chopped up into little bits

Feta crusts
200g (about 7 ounces) feta
French bread
Smoked paprika for dusting

Method

For as long as I remember I haven’t followed any particular rules about eating – whether it’s a scorching hot summer or blustery winter’s afternoon, a bowl of hot pasta always seems like a good idea. Likewise, even on the coldest nights I’ve been known to want to indulge in nothing more than a bowl of chilled gazpacho. Despite the importance of eating local produce and seasonally, I’ve never played by any other rules: it’s always a good time to follow your heart and gut! In saying that, I’ve recently been craving all the smokey food, whether it be smoked yoghurt, paprika, or chorizo. This brings me to my butternut pumpkin soup recipe. While the soup itself is fairly simple, it serves as a sweet base for the other little additions to shine. I’ve made a deliciously crunchy chorizo crumb topping and the paprika dusted feta toasts compliment it perfectly. There’s an underlying sweetness and smokiness that is addictive to say the least. Wait until you try it and you’ll see what it’s about!

1 To make the soup, heat the oil in a medium saucepan and add the onions. Cover pan with a lid and cook slowly for 12-15 minutes, until tender and lightly browned; stir from time to time. Add garlic and brown for 2 minutes, season with salt and pepper and add red peppers. Cover pan with a lid and cook gently for 5 minutes, until everything has softened; make sure the vegetables don’t catch on the bottom of the pan.

2 Add pumpkin and water or stock. Bring to the boil, partially cover pan with a lid and simmer for 30 minutes, or until vegetables are tender. Cool.

3 Put the vegetables in the bowl of a food processor with some of the soup liquid and process to form a thick purée. Adjust with more soup liquid – you don’t want a thin soup, but don’t leave it as thick as a pumpkin mash even if it does taste good! Adjust salt seasoning to your liking.

4 For the chorizo crumb, heat 1 tablespoon of oil in a small frying pan over medium heat. Add chorizo and fry, stirring, for a few minutes until golden (be careful not to let it darken). Scoop out with a slotted spoon and transfer to a plate lined with paper towels.

5 Cut feta into thin slices and pat dry with paper towels. Slice bread and grill on one side. Top ungrilled side with feta and grill until melting and golden. Dust with smoked paprika.

6 Quickly reheat soup and dish into bowls. Sprinkle with chorizo crumb and serve with feta toasts.

Roasted capsicum & butternut pumpkin soup

Roasted capsicum & butternut pumpkin soup

Share Share on StumbleUponTweet about this on Twittershare on TumblrPin on PinterestShare on FacebookGoogle+
Sticky Lemon Slice 1

Sticky Lemon Slice – Addictive!

Along with wanting to be a surgeon, another Mozart, and the next Attenborough, there was a brief phase where I desperately dreamt of becoming a dentist. As with most childhood desires, these dreams were fleeting and quickly forgotten when shinier ideas were hatched and the new spells they cast led me down a different path. While I can safely confirm the prospect of looking in mouths doesn’t excite me as much as it did when I was 8, it did impart a very real awareness of sugar and its effects on our teeth and health. I’ve never really been drawn to desserts and would definitely choose the ‘salty’ over the ‘sweet’ but there are exceptions … And this Sticky Lemon Slice is one of them! It’s crumbly and a little tart and it’s gooey and just a little addictive. I ate a couple of slices almost straight out of the oven from the latest batch I made and burnt my tongue, then continued to recklessly eat it until I felt nauseous from a sugar-overload and got a headache. Oh well, there you go … It’s hard to resist so you may as well surrender to it and share it with all those prone to sweet sticky manias. I assure you you’re not alone … or at least you won’t be now – it is seriously that delicious.Sticky lemon slice 3Sticky lemon slice 4

Sticky lemon slice 6

Dust with icing sugar

Sticky lemon slice

Slice with a serrated knife and serve

Recipe Sticky Lemon Slice here

Share Share on StumbleUponTweet about this on Twittershare on TumblrPin on PinterestShare on FacebookGoogle+
Squash soup

Squash & Coriander Soup

25 October 2016 BY Julie Biuso
SERVES: 4

Is it weird if I make soup for breakfast? London's grey today and I just found a kumara and a butternut pumpkin. Totally gonna do it, and play BOB in my fat jumper and feast while everyone is out hahahahaha. A Noble day indeed.

Ingredients

3 Tbsp extra virgin olive oil
2 onions, peeled and coarsely chopped
3 big cloves of garlic, peeled and chopped
A decent knob of ginger, peeled and chopped
1.5L (US a good 3 pints/UK2.6 pints) water
1 medium butternut squash, peeled, seeds out and chopped
2 large kumara (sweet potato), peeled and chopped
2 red potatoes, peeled and chopped
1 hot red chilli cut in half
A gigantic bunch of fresh coriander (cilantro)
Salt and pepper to taste
400ml (14 ounce) can of coconut milk
Lots of lime juice for squirting over at the end
Plain unsweetened yoghurt for the top, optional

Method

So, soup for breakfast, or anytime … squash, kumara, coconut milk, coriander, chilli – mmmm. An idea!

Squash prep 1

Squash prep

Squash prep

Flatmate Rob looks on … (soup for breakfast? Whaaaaa…..)

1 Heat oil in a saucepan over medium heat, add onions then lower heat to medium. Cook until tender, stirring often to make sure they don’t catch. If they are starting to char, drop the heat further and add some water.

2 Once onions are tender and lightly browned, add the garlic and ginger and cook through for a couple of minutes until you can smell them!

3 Pour in the water and add the butternut squash, kumara and potatoes along with the chilli and a handful of fresh coriander. It’s probably better at this stage to add most of the stalky bits of the coriander as it all gets whizzed up anyway and the fluffy leaves look nicer as a garnish to plonk on top at the end.

4 Add a generous pinch or three of salt, and freshly ground black pepper to taste, and let the soup bubble away until the veggies are tender. Throw in the coconut milk and bring to a gentle simmer.

5 Taste the soup and adjust seasoning as necessary. Grab yer blender and whizz until smooth, or leave some bits lumpy for added texture.

6 Serve immediately and top with more coriander and lots of fresh lime juice! And a blob of yoghurt … if you feel so inclined.

(Oh, PS, if you’re a bit spooked about spicy foods, remove the chilli before you whizz up the soup. It will have imparted some flavour and heat during the cooking process so if you prefer things on the mild side, that alone will suffice.)

Squash soup 1

Squash soup with coriander

Share Share on StumbleUponTweet about this on Twittershare on TumblrPin on PinterestShare on FacebookGoogle+
Breakfast eggs with magic balls 1

Ilaria’s Breakfast Eggs with Magic Balls

11 October 2016 BY Ilaria Biuso
SERVES: 4

These potato gnocchi are light puff balls that substantiate this dish without making it too heavy – they’re crispy on the outside and Mmmmmmeltingly tender on the inside.

Ingredients

Potato Gnocchi
500g (bit more than a pound) floury potatoes, peeled and cubed
Salt
Big knob of butter
1 large egg
120g (4 ounces) plain flour
Extra virgin olive oil for frying

3 Tbsp extra virgin olive oil
2 large red peppers (bell peppers/capsicums), core and seeds removed and finely diced
1 medium brown onion, peeled and finely diced
A few generous handfuls of watercress
8 free range eggs, at room temperature
Finely grated parmesan cheese (Use a microplane! They’re amazing!)
Finely grated lemon zest

Method

Ilaria’s Breakfast Eggs with Magic Balls

The inevitable is on our doorstep, breaking through the clouds drop by drop. Yes, October is bringing autumn with it. The colours that line the local canal have transformed from fresh green to hues of burnt orange, contrasting with the black, seemingly bottomless stretch of water.

I needed something light and bright to pick me up, but it had to be comforting and a little bit luxurious. I don’t know about you but for me, a plate of potato-y starchy goodness covered in oozing egg yolks with parmesan fits the bill perfectly. So here’s my decadent Breakfast Eggs with Magic Balls! A bed of cress gives the dish a fiery pepperiness, while softened red  peppers (bell peppers/capsicum) and onion give a sweetness that enhances the richness of softly poached yolks and parmesan. The potato gnocchi are light puff balls that substantiate the dish without making it too heavy – they’re crispy on the outside and meltingly tender on the inside. While they do demand a bit of attention, and take a few steps to make, they are worth it and really make this dish unique and special. If, however, you don’t have time, you can swap the gnocchi for simple roasted potato chunks – the choice is yours. Happy munching.

1 Let’s start off with the gnocchi as we all know the delights of waiting around for potatoes to cook! You can steam them if you prefer, or else, cook them in gently boiling water until tender. Drain well then push them through a large metal sieve with a rubber scraper (don’t process them as the purée can turn gluggy). Mix in the butter and half a teaspoon of salt, and put them aside to cool.

2 Next up, heat the oil in a large frying pan (skillet) and add the red pepper and onion. Cook on a very low heat stirring from time to time to ensure the pieces don’t catch. We want them to be softened to the max, so keep an eye on them to make sure there’s no burn. Once tender, set aside.

3 Bring the gnocchi back to the scene: to the now cooled purée, beat in the egg with a wooden spoon (beat vigorously at this point to draw in air, but don’t beat once the flour is added or the gnocchi will be tough). Sift over the flour and blend in.

4 Turn onto a lightly floured surface, knead very briefly to bring the dough together, then slice off a chunk of the mixture. Lightly flour the work surface and roll the potato mixture into a thin sausage shape (about the thickness of the handle of an old wooden jam-making spoon). Cut the roll into little ‘pillows’ with a sharp floured knife (the knife squishes the mixture as it cuts, leaving the pieces looking like elongated pillows). Repeat until all the dough is shaped.

5 Bring 2 medium pots of water to the boil – one for cooking the gnocchi and the other for poaching the eggs. When the gnocchi pot comes to the boil, turn it down to a medium-high heat and salt (you don’t want a roaring boil – the gnocchi are delicate and you don’t want them to disintegrate from giant bubbles!)

6 Drop in the gnocchi one by one, plopping them into the water; work quickly, flicking them in with the handle of a spoon. Cook gently for about 2 minutes, or until the gnocchi bob to the surface and settle. Remove the gnocchi from the water with a slotted spoon, and put them in a bowl.

7 To the other boiling pot of water, add a decent glug of vinegar (I randomly used apple cider vinegar as it was the first type I saw on our shelves!) Crack the first egg into a bowl, grab a big spoon and make a whirlpool in the pot, and plop the egg in. Ideally, all the white should fold over itself and turn opaque as it whirls around and (hopefully) come out a reasonably good looking poached egg. Fish it out with a slotted spoon and drain. Repeat for the other eggs. See information on poaching eggs here Poaching eggs

8 Heat oil in a fry pan and when hot add the cooked gnocchi and fry them until crispy! Done. Time to plate.

9 Put a generous handful of cress on to each of the serving plates, scatter over the red pepper and onion mix and crispy gnocchi, followed by the eggs. Sprinkle over finely grated parmesan and lemon zest, then season generously with salt and pepper and serve immediately!

Recipe Notes

This gnocchi recipe makes heaps as you’ll see, so only cook how many pieces you want to eat now – transfer the rest to trays lined with baking paper (I find this is the best thing to use to prevent sticking). You can cover the pieces loosely with more baking paper, or waxed paper, and leave in a dry place for up to 2 hours before cooking (do not leave them in a steamy atmosphere or they will become sticky), or refrigerate for up to 4 hours. Alternatively, freeze any you don’t need on a tray. Once frozen, transfer to a container. Cook from frozen, allowing about 5 minutes’ cooking.

Breakfast eggs with potatoes

Breakfast eggs with potatoes

Share Share on StumbleUponTweet about this on Twittershare on TumblrPin on PinterestShare on FacebookGoogle+
frothy beer

I brewed my own beer!

Ilaria here. I knew nothing about beer and barely drank it until I came to London. My go-to was Corona or Hoegaarden and I rarely stepped away from these two.

Then, WELCOME TO LONDON! And everything changed.

I was unaware that there were so many styles of beer for a start, and that there’s a ridiculous array of hops and malts from different sides of the world and the flavours of these are influenced by their geographic locations. Hops grown in England, for example, are bold, earthy, and tea-like. Czech hops on the other hand are crisper and lighter with some pepper notes; these are mainly used in Pilsners and Lagers. Hops grown in Australia and New Zealand are tropical and fruity, similar to those of America that are also fruity but piney and grassy, too. It’s the geographical region that the hops are grown in that gives them their unique flavour profiles. Think of it like wine – hops grown in warmer weather like New Zealand or West Coast America have a more tropical flavour.

During a Home Brew class at CRATE we used Challenger hops. We converted small chilly bins into brewing tanks by adding a small, netted filter at the base. The filter acted as a sieve to catch any malt that would otherwise slip through the tank into our eventual beer. We began by filling the tanks with hot water and pouring in the malt.

Adding malt

Adding in the malt to our makeshift tanks.

We then left the mix to drop down to the right temperature before adding more water to the tank. It’s important when adding more water that you do so delicately so the settling malt is not disturbed. Pouring the water over the back of a spoon usually does the trick!


Making beer

We have to siphon litres out at a time and pour them back in, repeating this cycle until the liquid eventually runs clear.

The liquid is then poured into a huge barrel and brought to the boil. The tank will be left with a bed of malt – the water we’ve added has absorbed all the flavour and goodness that we need so the spent malt can be thrown out, or feed it to a group of horses that just may happen to be casually loitering by …

Brewing beer

The malt has settled! After, we drain the water out of the tank we’re left with with residual malt.

During the boiling, the protein from the malt rises and bubbles to a thick beige froth. We added in our first round of hops at this stage and continued to boil the mixture for 45 minutes.

frothy beer

Our beer is on the way!

This first round of hops essentially adds the bitterness to the brew. The longer the hops are exposed to hot water, the more oils are extracted and consequently the bitterer the brew will be. The second round of hops added at the very end gives the beer it’s aroma, and also adds to the flavour. By adding in this second round for just a short flash of 15 minutes or so, the sweetness will seep out of the hops but very little bitterness.

Bubbling hops

Bubbling hops!

At this point we have to crash cool the brew otherwise the hops will continue to be affected by the hot water.  We ran ours through a tiny chiller, straight into our fermenters.

Crash chilling the beer

Crash chilling the beer and siphoning it into our fermenters.

Here we added in the yeast, and then we tucked them away for a few weeks. I added in a whack of white peach purée half way through the fermenting process in the hopes of creating a delightfully fruity pale ale! While I was unsure what to expect, I have to admit the end result was pretty tasty. The beer was sweet and floral, and actually smelt like strawberry yoghurt! For a first time go, I’ve gotta say I was pretty stoked! As I write this it’s a Sunday afternoon and in all honesty I think it’s fair play if I cracked open a couple of these home brew beers. That’s what it’s all about!

Share Share on StumbleUponTweet about this on Twittershare on TumblrPin on PinterestShare on FacebookGoogle+
Bar Gollem

Flemish feasting in springtime

Main square in Antwerp

Main square in Antwerp

Ilaria here. London has been grey and drizzly and we’re over it, but we seemed oblivious to the fact that a long weekend was looming until about three days before Good Friday. EEP! I was getting out of London, no matter what, but last minute plane tickets weren’t an option… However, a spontaneous drive to the continent was!

The idea to drive to north Belgium via Calais and the car train grew pretty organically – the distance was within our radius and with 5 of us squeezed in Tom’s Audi the travel was affordable, leaving more dough for Flemish feasting. And did we feast!

Leaving at 6.30 in the morning, we got down to Folkestone in southern England in time to get the 8.30am train. Half an hour later we’d crossed The Channel and by lunchtime we were in Bruges having our first waffle! I don’t have the biggest sweet tooth but thought I may as well go all out and top mine with Nutella and a dusting of sugar. Whether that’s a traditional combo or not, I’m unsure, but it did the trick and settled the tummy before we took a (very touristy!) boat cruise through the central city canals.

Boat tour in bruges

It’s super-touristy, but jumping onto one of these little boat tours is a great way to see a decent chunk of Bruges!

Bruges canals

Bruges is surrounded by canals, houses are situated right on the water’s edge.

Bruges is a sweet little city steeped in history, and full of ancient architecture.

The city centre bustles with shops and bars, just what you’d expect to see anywhere in Europe, but walking through the back streets was like taking a step back into the past. In an attempt to avoid the cafes and eateries around the main square, we waked for ages, probably in circles, before coming across an underground restaurant, serving up steak, chips, and beer. Everything we needed!

Soon after, we were en route to Ghent, a little larger and a considerably more beautiful city than Bruges. It is laden with cathedrals with one on just about every street corner! It is also home to St Bavo’s Cathedral where the Ghent Altarpiece by the van Eyck brothers is housed. Having made Art History my major at university, it was super-incredible to see this work in the flesh.

By the time evening came about we were ravenous – and we found the perfect spot in the central city, right by the canal. Although it wasn’t overly traditional, I couldn’t resist carpaccio for my entrée and duck with wild rice for the main. The wine match? A New Zealand Cable Bay Syrah.

Carpaccio

Carpaccio is of course Italian, not Flemish,  but it came laden with parmesan cheese so I didn’t complain.

Duck with wild rice
Duck with wild rice
Pork rack with ebly
Pork rack with ebly (wheat berries), capsicum and peanuts

Next stop was Antwerp, a bigger city again, with a mix of old Flemish architecture and new commercial buildings. Just by the main square, we found Bar Gollem, named after the precious Gollum. This bar was a total gem! It had about 30 Belgian beers on tap and about 40 more canned or bottled beers available. The waiter brought us 5 interesting beers none of us had heard of, each different in style, and gave a little run down on them all. But most importantly, Bar Gollem also had Flemish Stew on the menu, and this was an absolute highlight!

Bar Gollem

Bar Gollem was amazing – spoilt for choice …

Beers in Antwerp

First round of beers in Antwerp

While the photo doesn’t do the dish justice, this is probably one of the best stews I’ve had. It was fairly basic and I couldn’t even detect many vegetables or herbs in it. The meat (beef shin) was gloriously tender and succulent with no fatty or gristly bits (they give me the heebie-jeebies) and it paired perfectly with an accompanying dish of red cabbage; it also came with chips – everything seems to come with chips in Belgium! I swear by the time we got back into London I’d probably stretched my stomach to double (potentially triple) its size and maybe felt a bit guilty, but in hindsight, I wouldn’t have changed a thing.

Flemish stew
If you’re going to Belgium, be prepared: everything comes with chips, hehe.
Flemish stew
The most amazing Flemish stew – I could have eaten about 3 of these …

Share Share on StumbleUponTweet about this on Twittershare on TumblrPin on PinterestShare on FacebookGoogle+
Tanked up Niçoise

Tanked Up Niçoise

26 January 2016 BY Ilaria Biuso
SERVES: 4

Christmas treats, New Year's treats … January is nearly over so it’s sorta time to get things back on track. Welcome salad! But tanked up salad with all the trimmings including fried, salted croutons …

Ingredients

2 red peppers (bell peppers/capsicum)
3 Tbsp extra virgin olive oil
Finely grated zest of 1 lemon
2 Tbsp lemon juice (juice of about 1 nice squidgy lemon)
1 small red chilli, deseeded and finely chopped
2 cloves garlic, peeled and crushed
100g (about 3 ounces) sugar snaps
8 black olives (Crespo olives are a winner here!)
2 tsp salt
Freshly ground black pepper
4 big iceberg lettuce leaves
100g (about 4 ounces) baby salad mix
100g (3-4 ounces) canned tuna, drained
1 avocado, sliced and cubed into small chunks

Croutons:
3 medium slices of fresh sourdough or grainy bread
2 Tbsp extra virgin olive oil
Salt

Method

1 We want to char-grill these peppers so have a look HERE to do it. We want them delightfully blackened! Once they’ve cooled, remove skin, core and seeds, and slice into thin strips of tasty goodness.

2 For the croutons, heat 2 tablespoons oil over a medium-low heat in a medium-sized frying pan. Slice the pieces of bread into chunky 2cm (¾“) cubes and add to the pan with a generous sprinkle of salt. Fry the bread for around 3 or 4 minutes, until crispy. These crunchy morsels are addictive so while it’s best not to get involved and snack on them, I also highly advise it… they’re too tempting, and delicious. And life is too short. Fried salted bread. WHY NOT.

3 When bread is adequately crispened, (not sure if that is even a word!), scatter on to a plate lined with paper towels and set aside for later.

4 In the same frying pan, heat 3 tablespoons oil over a low heat and add the lemon zest, crushed garlic, and chopped chilli and gently sizzle for about 20 seconds only! You want to infuse the oil rather than fry the ingredients so keep a watchful eye as the garlic will burn pretty quickly. Turn heat off and transfer to a large bowl and set aside. (The zest, garlic and chilli will continue sizzling in the bowl from the oil’s residual heat so don’t over do it!)

5 If there are any spooky ends on the sugar snaps, chop them off along with any stringy bits. Bring a small pot of water to the boil and plunge sugar snaps into the bubbling water and cook for 2 minutes. Drain in a colander and refresh with cold running water until they feel cool. This stops them cooking further and turning into lifeless floppy blobs and locks in their green colour. Drain again and dry on paper towels.

6 If the olives aren’t already pitted, then pit them, and chop them into little pieces. Add to the large bowl along with the lemon juice, salt and freshly ground pepper. Mix it up.

7 Wash and dry iceberg leaves and break into small pieces. Add them, the baby salad mix, tuna, avocado, sugar snaps, and sliced pepper to the large bowl and toss. Check seasoning and serve with the croutons on the side.

8 Feast immediately!

Share Share on StumbleUponTweet about this on Twittershare on TumblrPin on PinterestShare on FacebookGoogle+
Spain isn’t Spain without her jamón!

Barcelona!

Hi. Ilaria here. It was freakish energetic excitement that helped us get out of bed at a goddam awful time in the morning to catch a cheap flight to Barcelona. But it was all worth it once we touched down about 10am, Spain-time.

This city boasts a curiously beautiful balance of 21st century inevitability and the past; intoxicated souls roam the labyrinths of century old pavements, dancing between the shadows of the Gothic Quarter and the sparkle of Barceloneta beach. This city reminds you the past can be just yesterday if you want, while the future waits for tomorrow ­– Barcelona is about the now, exploring the moment before you. And with that, we dropped our bags at the hotel and headed straight to Las Ramblas and the Mercat de La Boqueria, the most amazing market in town.

Figs, cherries, prickly pears, you name it, La Boqueria has it.

Figs, cherries, prickly pears, you name it, La Boqueria has it.

Some pretty impressive, and strange, looking marzipan …

Some pretty impressive, and strange, looking marzipan …

Tropcial treats

Tropical treats

Along with these oysters there was some of the freshest fish from the Mediterranean, all lined up on a bed of ice.

Along with these oysters there was some of the freshest fish from the Mediterranean, all lined up on a bed of ice.

This place is a visual feast in itself. Without tasting a single thing, the sweet smells of serrano ham, the colourful sights of exotic fruits, and the clatter and chatter of plates and people is inspiring enough. However, the tapas bars through La Boqueria’s big iron gates are hard to go by.

Spain isn’t Spain without her jamón!

Spain isn’t Spain without her jamón!


The so-called jamón slicer

The so-called jamón slicer

An example of the tapas displayed atop a tapas bar cabinet. Pick what you want, and pay the relative amount after you’re your discarded toothpicks left on your plate are counted.

An example of the tapas displayed atop a tapas bar cabinet. Pick what you want, and pay the relative amount after the discarded toothpicks left on your plate are counted.

We nibbled non-stop for a couple of hours (it’s so easy to do!), one tapa at a time. Charred padron peppers with generous slices of fried chorizo skewered onto pieces of baguette was the standout morsel of the day. Many more bites of potato tortilla and croquetas, both atop slices of baguette (who can refuse a double starch combo!?! Hehe …), were washed down with sneaky cañas (smaller sized beers) and cheeky Rioja sips. Feeling significantly heavier than when we arrived, we plodded up the hills to the top of Park Güell, a Gaudi haven with a beautiful outlook over the city. With the sun on our shoulders we effortlessly watched tiny people hurriedly scurry between streets, moving on through an endless afternoon.

Soaking up the city views.

Soaking up the city views.


Share Share on StumbleUponTweet about this on Twittershare on TumblrPin on PinterestShare on FacebookGoogle+
Ilaria in garden

Pig on the beach – true!

Last Tuesday Nick and I decided to take a wee trip south to stay a few days with family friend Joanne in her traditional English thatched roof cottage. As it turns out, there’s nothing like a little escape from the hustle and bustle of East London to a leafy, lush, foodie hotspot.

What should have been a fairly simple 2½-3 hour drive from London to Dorset turned into an extended mission meandering through traffic, GPS fails, unnecessary roadside café stop-overs, and a few wrong turns, but 5 hours after leaving London we found ourselves in Wareham – a beautiful and Medieval-esque town in the English countryside. It was worth the drive.

On Wednesday morning we woke up early enough to see the cows taking their morning stroll through the village streets on their way to be milked. Following in their footsteps (or hoof steps…Haha!), the three of us walked through the town following Piddle River to its source, Poole harbour.

Cows in English village

The 8.00am trot

Piddle River

Looking towards Wareham…a moody mid-summer morning

Destination number two for the day – Pig on the Beach (http://www.thepighotel.com/on-the-beach/explore/) Joanne hadn’t stopped raving about Pig on the Beach flatbreads since we caught up, saying they’re the best she’s ever eaten – a pretty big call from someone who’s travelled as extensively as she has. Without further ado, the three of us tucked into our hired Ford Focus and drove about 45 minutes south to Studland. The weather had been a bit spooky, always threatening to dampen our jackets, but we struck it lucky and the afternoon sun shone. A bottle of rosé. Perfect. A flat bread each. Perfect. A homemade ice cream after and a walk in the vegetable and herb garden – delicious. What a treat, honestly. The photo here shows one of the Pig’s renowned flatbreads. The ingredients are simple, if anything, fairly minimal, but the combination of flavours and produce (all from their garden or else locally sourced) is inspiring. I chose the Pig’s coppa (a cured pork product), rocket, parmesan and nasturtium flatbread. It went down too easily. I could’ve eaten three, or even four … I don’t know, they were all so light! I suppose they’re a lot like pizza but with the thinnest crispiest crust ever. There’s absolutely zero room for doughy, stodgy crusts here. That’s why if left to my own devices I truly could have wolfed down four of them!

Flat bread

Flat bread with coppa at Pig on the Beach

Ilaria in garden

Me in the vegetable & herb garden at Pig on the Beach

Rose, flatbreads, a coastal view ... what more do you need.

Rose, flatbreads, a coastal view … what more do you need.

Travelling West from Wareham with Stonehenge in mind, we made a brief drive by Durdle Door (reminded me a bit of the Coromandel in New Zealand), Bridport, and Axminster, a small town in Devon. Nick and I shared a few small plates for lunch at the River Cottage Canteen and left bursting! (Although, we still had room for a garlic mushroom and goat’s cheese pie from the markets over the road…). https://www.rivercottage.net/canteens/axminster  Maybe it’s the Italian in me, or maybe it’s because a salad this light and fresh is hard to go past on a summer afternoon, but my favourite dish at the Canteen was an Isle of Wight tomato and mozzarella salad with chives and pesto drizzle – the perfect match to the Canteen’s homemade ciabatta and a locally brewed cider. Hehe.

Isle of Wight salad

Isle of Wight tomato & mozzarella salad with pesto drizzle

River Cottage Canteen

Cabinet at River Cottage Canteen

The pie man

The pie man! Duck Farm deli. Best garlic mushroom & goat’s cheese pie ever!

After a few days of non-stop feasting, dinner later that evening was minimal, just a few antipasto bits and bobs we’d picked up along the way to Wiltshire, our home for the evening. The following morning along the M25, we followed the rain back to London, back to Hackney Wick, back to a beer and pizza at the local.


Share Share on StumbleUponTweet about this on Twittershare on TumblrPin on PinterestShare on FacebookGoogle+
5 Grain Bread

Bring me bread and oil

Hi, Ilaria here. I don’t know about you, but I love bread, especially wholesome grainy bread with seeds. I love seeds! I also love pasta, and rice, and polenta … Basically, a big feast of carby-goodness will always put a smile on my face. I like to justify my appetite for such things by ‘blaming’ it on my Italian heritage – I’ve mentioned before that I can eat my bodyweight in pasta, and it’s the same story for bread; it’s in my blood! There’s just no other way! Bring me bread and oil, and I’m a happy camper. This particular bread recipe that I’m sharing with you holds a very special place in my personal bread history …

It all began in Italy. I traveled there often with my family when I was younger, for a month or so at a time, during summer. As well as spending time in Tuscany and Reggio Emilia, I would stay in Genova with my Auntie (Zia) Margot. Every morning we would go on a quick stroll to the bread shop at the corner of her street to pick up enough bread to last through lunch and dinner. As well as grabbing the standard ciabatta, Zia Margot would always buy me a piece of focaccia bread for breakfast. Honestly, this particular Genovese focaccia is the best I’ve ever tasted. I think what made it so spectacular was the lightness of the dough that still maintained a delicate element of bite and stretch, as well as the rosemary scattered through it, and the generous drizzle of extra virgin olive oil and the sea salt on top. Thinking about it now is literally making my mouth water! If I can pinpoint the exact moment I fell in love with bread, it was right then and there, the first time I tried that focaccia in Genova.

Fast forward to November 2010 and I’m living in the Haute Savoie region in France. I’d just turned 19 when I set off again on an adventure to the other side of the world (from New Zealand), unsure of the general plans except to have a base in Annecy. Haute Savoie is the bread and cheese capital of France! Along with discovering the freshest and mildest goat’s cheese, I also discovered the “Boulangerie” and the “Patisserie”. I gotta say when it comes to bread, the French have it sussed. My usual lunch ritual in Annecy was all about the little bakery at the end of Rue Jean Jaures where I lived. This was a haven full of the most tantalizing loaves and treats you could imagine. There were mini pizzas, palmiers, chocolate brioches, fig tarts, and sandwiches… the most glorious sandwiches I’ve eaten! My regular was the small white loaf smeared with a little garlic, a drizzle of oil, goat’s cheese, jamon serrano, and walnuts. It was perfect and satisfied everything I’d hoped for in a sandwich.

Four years later, and I’m still obsessed with bread. My latest cravings tend to lay alongside Wild Wheat’s Kumara bread, and this easy wholesome loaf called Dianne’s 5 Grain Bread that’s been handed down to me from my mum and to her from her sister, my New Zealand Auntie Dianne. I was feeling a little low the other day, feeling like I needed something warming and comforting. Yep! I ended up baking bread! Just by mixing yeast and water the dough rises and 50 minutes later you have two crusty-topped soft-centred warm loaves ready to be slathered in your favorite topping. I hope that if you’re in need of a little comfort during the cooler afternoons, or if you’re after a substantial and healthy loaf, you’ll give this recipe a go and enjoy it as much as we all do.

Share Share on StumbleUponTweet about this on Twittershare on TumblrPin on PinterestShare on FacebookGoogle+
Spicy chickpea patties

Ilaria’s Spicy Chickpea Bunnuce Burgers with Green Chilli Yoghurt Dressing

9 June 2015 BY Ilaria Biuso
SERVES: Makes 12

These are seriously so good that I swear they’ll beat any kebab and falafel combo that a 1.00am service, or any other time, can offer you.

ingredients

Patties
1 large onion, peeled and finely chopped
1 red (bell) pepper, halved, seeds removed and diced
2 Tbsp olive oil
2 cloves garlic, peeled and crushed
1 Tbsp crushed coriander seeds
2 tsp ground cumin
2 x 400g (15–ounce) cans chickpeas
1 large (size 7) free-range egg, lightly beaten
1 cup panko crumbs
3 Tbsp chopped coriander (cilantro)
Finely grated zest of 1 lemon
1 tsp salt
Extra olive oil for frying
Iceberg lettuce leaves, optional

Green chilli yoghurt dressing
1 cup plain unsweetened yoghurt
Few pinches salt
2 small hot green chillies, halved, deseeded and finely chopped
2 Tbsp chopped mint
¼ tsp ground cumin

Tomato vinaigrette
1 large vine tomato
3 Tbsp finely chopped red onion
1 hot red chilli, halved, deseeded and finely chopped
3 Tbsp extra virgin olive oil
1 Tbsp white wine vinegar
½ tsp salt

Method

1 To make the patties, put onion and red pepper in a medium frying pan (skillet) with 2 tablespoons oil over a medium heat. Cook for about 12 minutes, until tender and onion is lightly golden. Add garlic and cook through for 1 minute, then add coriander seeds and cumin and cook for a couple minutes more. Take pan off the heat and let the mix cool for a bit so by the time all the ingredients come together, the egg won’t curdle or cook or whatever it does when around piping-hot ingredients!

2 Drain chickpeas, rinse them thoroughly and drain again. Mop dry with paper towels. Put them in a large bowl and partially mash and smash them with a potato masher; don’t go too OTT here as you don’t want to make it into a hummus! Keep it lumpy and textured. Add onion and red pepper, egg, panko crumbs, chopped coriander, lemon zest and salt and mix well.

3 Form into 12 (or there about) patties and put them on a plate. Cover with plastic food wrap and chill for 1 hour to firm. The chilling helps the patties stay together during the frying. Mmmm frying …

4 In the meantime, for the chilli yoghurt dressing, mix yoghurt, salt and chillies. Sprinkle mint and ground cumin on top and swirl through. Easy!

5 To make the vinaigrette, cut the tomato in half, remove the core, then dice flesh finely. Drain in a sieve for 10 minutes. Mix remaining ingredients in a bowl, add drained tomato and set aside until ready to serve.

6 Heat 4 tablespoons olive oil in a large frying pan over a medium heat. Fry patties until nice and golden, turning them carefully with two spoons. Transfer to a plate as they are done. Assemble bunnuces (Bunnuceae? Bunnuceum? Bunnucezums?? Haha) by putting chickpea patties in lettuce leaves with spoonfuls of tomato dressing and generous dollops of yoghurt sauce. Fold up, try not to dribble juice everywhere, and eat! YUM!

A few tips

Don’t expect these patties to perform like meat ones – they are very soft and delicate in texture, but their deliciousness makes up for any shortcomings in that area. You can make them more than an hour in advance – they’ll even hang in for a day ahead, just keep them covered and refrigerated. And, once they’re cooked, they’re great to take to work for lunch. Yum yum.

The yoghurt dressing is also good for a day or two. Keep it covered and refrigerated. I also love it on barbecued chicken or lamb, or on fried eggplant. The tomato vinaigrette will also keep well for a day, providing the tomatoes are nicely drained before mixing with everything – otherwise, they give out water and dilute the dressing.


Share Share on StumbleUponTweet about this on Twittershare on TumblrPin on PinterestShare on FacebookGoogle+
Chickpea patties

What’s a bunnuce burger?

Chickpea bunnuce burgers are healthy, substantial, crispy, and for you vegos out there, vegetarian. What’s a bunnuce burger? A burger or patties wrapped in lettuce not in a bun! What’s not to like about them! A few weekends ago I was down in Wellington (check out Shared Kitchen’s Instagram and Facebook page https://facebook.com/sharedkitchenblog) renewing my Italian passport. You have to front up personally at the Embassy and have your fingerprints taken. (Read expensive!) It was around 1am on Saturday night when I had the kebab of my life! Sure, it was post-drinkies so hunger and the usual cravings were at an all-time high, but holy cow. The kebab I had blew my mind! I must admit that kebabs are a weakness that I embrace openly, so I’m not afraid to say that I am a bit of a kebab aficionado. Hehe. Unlike the stock standard chicken doner kebabs you happen across everywhere, this one had an excessively generous drizzle of garlic yoghurt, a thick dolloping of hummus, tender spicy chicken pieces, a tomato salsa, and, lo and behold, a generous side of falafel. It was also massive. I had to force myself to eat it all, but, you guessed it, I managed, just. Success!

The inspiration for these chickpea bunnuces actually stems from this Wellington evening, and my recipe is a personal twist on the flavours and textures I experienced – there’s crispy light patties, a thick creamy sauce with a decent bite, a juicy crunch of lettuce, as well as a fresh sharp tomato salsa. These babies are kebabs’ next level … mainly because they have everything you need in them, but they are healthy with very little fat and salt. This, therefore, means you can eat however many you want, any time you want, without feeling guilty (and greasy) afterwards.
In terms of their creation, I do have my mum Julie to thank a bit here as she truly is the Patty Queen. Haha, it sounds so glamorous, doesn’t it? But her title is well deserved. She advised that an egg added to the mixture would hold all the ingredients together, and to add panko crumbs to make them light. The crumbs make it easier to shape the patties and they help them keep shape while frying. The result is a soft delicate pattie rather than a stodgy mountain of dryness. Anyway, enough babbling from me! Just give these a go – they are seriously so good and I swear that they’ll beat any kebab and falafel combo that a 1am service, or any other time, can offer you.

Share Share on StumbleUponTweet about this on Twittershare on TumblrPin on PinterestShare on FacebookGoogle+

More from Ilaria's Kitchenette

About this blog

ilaria

Kitchenette is the companion blog to Julie Biuso's Shared Kitchen and is run by Ilaria Biuso, Julie's daughter. It is a space for Ilaria to share her exploration of modern (mostly) healthy exciting cuisine.

Subscribe

Keep up to date with all the latest...

  • Facebook
  • Instagram
  • Pinterest
  • Tumblr
  • YouTube

Essentials

  • 10 minutes with…
  • Tastings
  • Kitchen things we like
  • Reviews
  • Sites I like
  • Weights & measures
  • Copyright & disclaimer

Categories

  • Recently posted
  • Julie’s Blog
  • Ilaria’s Blog & Recipes
  • Special occasions
  • Breakfast
  • Lunch
  • Dinner
  • Dessert
  • Spring
  • Summer
  • Autumn
  • Winter
  • Wine & drinks

Posts by month

  • April 2018
  • March 2018
  • February 2018
  • January 2018
  • December 2017
  • November 2017
  • October 2017
  • September 2017
  • August 2017
  • July 2017
  • June 2017
  • May 2017
  • April 2017
  • March 2017
  • February 2017
  • January 2017
  • December 2016
  • November 2016
  • October 2016
  • September 2016
  • August 2016
  • July 2016
  • June 2016
  • May 2016
  • April 2016
  • March 2016
  • February 2016
  • January 2016
  • December 2015
  • November 2015
  • October 2015
  • September 2015
  • August 2015
  • July 2015
  • June 2015
  • May 2015
  • April 2015
  • March 2015
  • February 2015
  • January 2015
  • December 2014

Shared Kitchen
Julie Biuso
2014

  • Home
  • About us
  • Cook’s notes
  • Ilaria’s kitchenette

© 2014 Please see our copyright page for conditions on use of content here

  • Home
  • About us
  • Ilaria’s Kitchenette
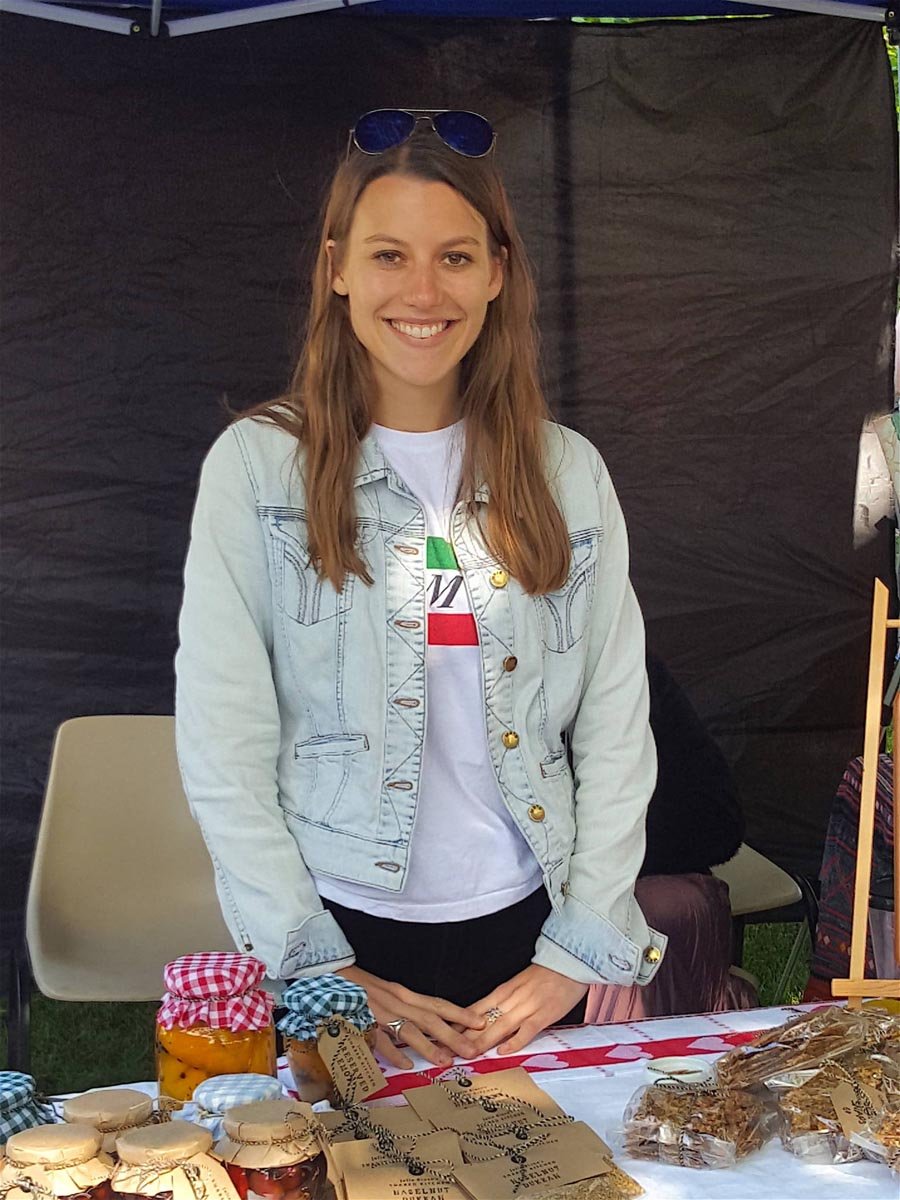
  • Categories
    • Special occasions
    • Breakfast
    • Lunch
    • Dinner
    • Dessert
    • Baking
    • Spring
    • Summer
    • Autumn
    • Winter
    • Wine & drinks
    • Back
  • Essentials
    • 10 minutes with…
    • Kitchen things we like
    • Recently posted
    • Reviews
    • Tastings
    • Tips & tricks
    • Something for the weekend
    • Weights & measures
    • What’s at the farmers’ markets
    • Back